Monday, March 23, 2015

Disney's Wine and Dine Half Marathon 2014


Half Marathon #5 - Disney's Wine and Dine Half Marathon
- November 8, 2014
 

From all the Run Disney blogs I've read, the Wine and Dine Half seems to be a favorite.
 
But there was only one reason I wanted to run it...
 
Christmas!
 
I wanted to see what the Disney parks looked like when they are decorated for Christmas.
 
I got a glimpse last year when we did the Tinkerbell half marathon at Disneyland in January.
 

Even at the end of January, Disneyland still had a few Christmas decorations up.

And of course that just made me want to actually go at Christmas!
 
So my mom, a teacher friend, and her mom, all signed up for the Wine and Dine Half Marathon Weekend.


What can I say, I love an organized suitcase.


The four of us loaded up my car that Thursday afternoon, and we were off to Orlando.
 
We got in pretty late that night, but we had to be up first thing the next morning.
 
We had breakfast reservations at O'hana, at the Polynesian Resort.


The view from the dock that would take us to the Contemporary Resort, so that we could take the monorail to the Polynesian.


It was a gorgeous morning from the Wilderness Lodge.


I've actually eaten breakfast at O'hana before, but I forgot how wonderful it was!


"Cousins," aka servers, bring huge platters of food to your table and you serve yourself.
 
My favorites are the eggs, the Mickey waffles, the hot chocolate, and most of all their juice.  The juice is a blend of guava, passion fruit, and orange juice. 
 
It is delicious!!
 
I probably drank 3 glasses of it.
 
Mickey, Lilo, Stitch and friends, are all dressed up in their Hawaiian attire and do a little walk around thing with the kids.  Then they come around and take pictures.


After breakfast, we were able to take a bus directly from the Polynesian Resort to the Run Disney expo, at the ESPN Sports Center.


Not nearly as busy as Princess expos!


If you follow Run Disney on instagram, they have a little booth set up where they take your picture in front of a green screen.
 
Love it!


Our room at the Wilderness Lodge.
 
This was my first time staying at this hotel and the only time I've stayed at a Deluxe resort.  We were able to afford it because there were four of us sharing one room.


You can see my bags of expo goodies on the bed.
 
We rested for a little bit and then we were off to Mickey's Very Merry Christmas Party!
 

Good thing I bought our tickets in September!


The tickets say that the party starts at 7pm.  But you can get into the parks around 4pm. 
 
It was crazy busy at first because people were leaving the park who didn't have Christmas party tickets and people who did have party tickets were entering.


We walked around, took a few pictures, rode a couple of rides, and then headed off to our dinner reservations at the Liberty Tree Inn.
 
After dinner, we got some cookies and hot chocolate.
 
Then we found a spot for the Christmas parade.


There was also a special Christmas fireworks show.

 
Then it was back to the hotel for bed, Mickey's Jingle Jungle 5K was first thing the next morning.
 

I love Disney 5Ks! 
 
They are just so much fun and definitely a family affair.


They even showered us with fake snow while we were waiting to start.


The four of us, waiting to start.


And as always with any Run Disney event, they had entertainment at the starting line.


So we started off.
 
We had decided to strictly walk only during this race because our half marathon would take place later that same night.
 
I've never completed 2 races in one day.  So I was serious about no running.


I loved that this race went around Animal Kingdom!


I love these little signs posted at each mile.
 
And no, it didn't take me 28 minutes to walk a mile.  I was in the 5th corral, so 4 corrals took off before us when the clock started.


Lots of characters along the way!


The tree of life behind us.


I love "costume watching" at Disney races!
 
Fix-it-Felix was in front of me for awhile.


A blurry Tigger and Pooh in front of us.


I loved these festive costumes.


The Toy Story gang.


We also walked through some back lots.
 
Which most people find boring, but I love seeing what's going on behind the scenes at Disney.
 
Here is the Animal Kingdom Christmas tree getting ready to go up.


Pluto


And the line of people waiting to take a picture with Pluto.
 
Um, no thanks.  I would much rather take pictures of random people with the characters than wait in  a line that long.


The back-lot view of Expedition Everest.

And as always, Marathonfoto was on the scene ready to take pictures of me being silly.


Even after the race I was still costume watching.

 
Here are the three fairies from Sleeping Beauty.


And I just love this sweet family all dressed up!


The awesome box of goodies you get after any Run Disney event. 
 
This one had skittles!
 
We had a lot of time to rest between our 5K and Half Marathon, so I used that time to take some pictures of our awesome hotel!


Very peaceful!


And then I snacked before my shower and nap.
 
 
Next we had late lunch reservations at our hotel's restaurant, the Whispering Canyon Café.
 
But of course I had to take more pictures of the interior while we waited for a table.


If you've every been to Yellowstone, this resort may look a little familiar.  It was modeled after the Old Faithful Inn at Yellowstone National Park.


I eat very vanilla before a race, so I just had a turkey sandwich.
 
Then I splurged and had this for dessert.
 
Wagon Wheel Chocolate Smores
 
(Described as warm dark chocolate sauce and marshmallow gelato)
 
It was delicious!!


Now time for the actual race.
 
It started at 10pm, but we got there around 8ish.
 
We knew that it was going to rain by this point, so I had grabbed a trash bag to wear.  I had a poncho, but I wasn't sure if I would want to wear it the whole time, and I didn't want to throw it on the side of the road, only to need it again.  So I went with a trash bag.
 
So glad I brought that visor.
 
By this time I was not feeling well at all.  I'd been having stomach issues all weekend.  And I took my temperature right before we left the hotel and it was 100.  So I took a few Tylenol as we boarded the bus.
 
As we waited for the race to start, I decided to try and walk the whole race.  Usually I follow Jeff Galloway's walk/run intervals.  But with stomach issues and a fever, I decided walking would be my best bet because I just wanted to finish.

 
This was right the rain started.
 
The rain actually cooled me off and made me feel a little bit better.
 

It rained the entire time!  Not pouring rain, but a slow soaking rain.
 
I'm so glad I had baggie to put my phone in.
 
We started off running through Animal Kingdom again.


Then we ran to Hollywood Studios.

I knew Disney was going to be taking the sorcerers hat out of Hollywood Studios, so I wanted to get one last picture of it.


This tunnel was part of the back-lot tour, you can see where they create the costumes for the Disney parks.


My one picture of the Osborne lights that wasn't crazy blurry.


A little after this picture, I realized the pacers were in the same park as me, not right behind me, but too close for comfort.  I just had to make it back to Epcot and I would not get taken off the course, but I was not taking any chances.  I walked crazy fast here.
 
No more pictures during the race.
 
I actually saw all the buses lined up and ready right as I entered the boardwalk.  This was the last sweeping point.  Once you made it here, they weren't going to take you off the course.
 
Walking along the boardwalk in the rain with all the people trying to stay on the course was no fun.  It was very slippery. 
 
By this point I was feeling very sick and lightheaded again. 
But my friend caught up to me and encouraged me through the end.
 
When we got into Epcot, people started screaming and pushing because the balloon ladies were behind us.  The balloon ladies try to keep an exact 16 min mile pace.  They serve as a warning, anyone who falls behind them may be taken off the course.  So even with all those people screaming and pushing, I took off running.
 
It made me feel so sick!  I knew that they wouldn't sweep me off the course in the last two miles.  But I still didn't want to get behind the balloon ladies.
 
Finally, the finish line!
 
One of the perks about the Wine and Dine Half Marathon is that you get special entrance into the Food and Wine Festival at Epcot.  They keep it open late that night especially for the runners and guests.
 
But no way was I going to the Festival.  I headed straight for the buses.


The after picture.
 
I ran the whole race wearing the trash bag.  Which didn't really help because I was still completely soaked.


My Elsa race outfit, since I knew there would be no course pictures of me in my outfit.


 Thoughts on Wine and Dine:
  • My least favorite race, not because of the race itselft, but because I wasn't feeling well and I was soaked the whole time.  I get crazy blisters after each half marathon anyway, but after running 13.1 miles in soaking wet shoes, I had 19 blisters on my feet.  Yes, the teachers at school counted them at recess.
  • I decided I am not a night race person.  As much as I hate getting up at 2am for a morning Run Disney race, the night ones are even more difficult for me.  I've ended up feeling extremely sick after the two that I've done.  So, no more night races for me.
  • I love that we ran through 3 different parks: Animal Kingdom, Hollywood Studios, and Epcot.
  • This could've been a fun race, if circumstances were different, I can see why so many people love it.  But my favorite is still the Princess Half.
Stay tuned!
 
My Princess Half Marathon 2015 review is coming up next!


Sunday, March 22, 2015

How to Make Glue Sponges

I love teaching kindergarten!
 
But I hate glue sticks!
 
At the beginning of the year it's fine because we seem to have a limitless supply.  Then around Halloween, as our supply begins to dwindle, I become the glue stick police.
 
"Make sure you twist the glue stick down before you put the lid on it."
 
"Who's lid is on the floor?"
 
"No, you cannot have another glue stick just because you forgot to snap the lid on and it dried out!"
 
Glue sticks become the bane of my day!
 
Okay, I'm being a little dramatic here.  But they seriously drive me nuts!!
 
So I saw this pin last summer as I was trolling pinterest.
 
Glue sponges!
 
Sounds like a great idea.
 
But do they really work?
 
I didn't give it much thought until Thanksgiving when we seriously ran out of glue sticks.
 
So I searched on Pinterest to see if anyone had actually tried to use these glue sponges with any success.
 
And not only did I find someone who used them, but he made a video and posted it on YouTube.
 
If you don't already know who I'm talking about, it's Greg from The Kindergarten Smorgasboard!
 
I watched his video and was like, that is so easy!
 
But it gave me the confidence to go out and buy all the materials and give it a go.
 
So I debuted these little babies in December and I totally believe they were a gift from God!

 
Okay, being dramatic a little bit again.

I made 2 glue sponges for each table.  I have 5 kids per table.  So 2-3 kids are sharing each container with no issues.  One of the first grade teachers at my school made one container for each of her kids since they sit at individual desks.  I was still a little hesitant though when I first made these, so I didn't want to invest in buying each child their own before I knew they worked.

But now I've realized that I need a few more glue sponges.  I need one for me, extras for our art center, and extras in case someone is in timeout has to go work at a table by themselves.

So I thought this would be a great time to show how easy they are to make!

First gather up your supplies:
 
You need containers, sponges, and lots of liquid glue.


I bought my containers really cheap from Walmart.


I put about 1/2 to 3/4 of a bottle of glue in the bottom of each container.  Depending on the size of your containers, you may need more or less.


 Lay your sponges on top.
 
The containers I used for my original glue sponges were square.  So I used 1 and a half sponges to cover the bottom.


 Pour more glue on top.


 Put the lid on and let them sit over a weekend.  I made these right before we left for Spring Break.  By the time we get back, the sponges will have soaked up all the glue and be ready to use.


 They took a little getting used to at first. 
 
Like with anything else in kindergarten, I had to show my kids how to use them. 
 
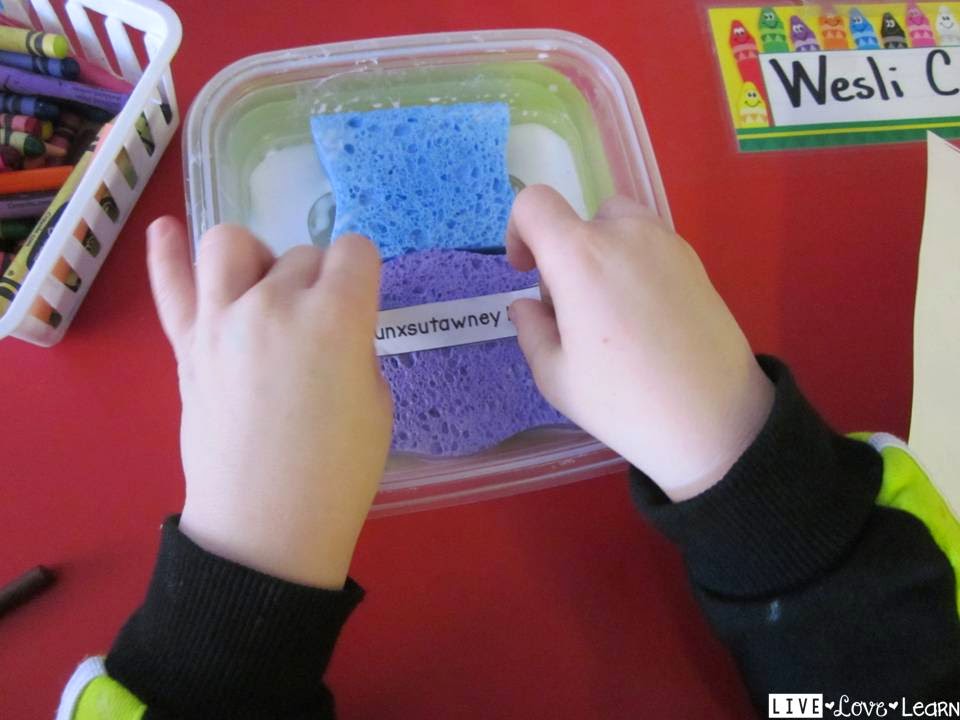
I demonstrated how to gently press their piece on the sponge, not the glue at the bottom, without getting glue on their fingers, and how to get glue on a big piece of paper (like for an art project).
 
It took a little practice not getting glue on their fingers or soaking their piece of paper, but now they are pros.
 

When we aren't using them, they stack up nicely in the middle of each table.
 
And then when we need them, my kids know who shares with who, they share with whoever sits across from them and kids on the end share with their elbow partners, and where the glue tubs go, on their name tags, so that everyone has equal access.


I do find that I have to "refresh" our glue sponges every 2-3 weeks.  So I just have my kids open up the glue sponges on a Friday afternoon, and I'll walk by and squeeze some more glue onto each sponge.  We close up the container, stack them up, and by Monday the sponges are soaked with glue again.
 
Another tip that Greg shared was to make a spray bottle, I bought a medium sized bottle from Dollar Tree, with a lid-full of Listerine and the rest water.  Shake it up and spray each glue tub every few weeks.  This kills the bacteria that might be trying to grow in the moist sponge and makes the glue sponges smell nice. 
 
 
Yes, I've caught my kids sniffing the glue sponges.  Better than eating the glue I suppose.  And so far I haven't had any issues with mold growing in the bottom of my containers.
 
So with a little preparation, and a little training, we've got these glue sponges down pat.  I don't know if I even want to introduce glue sticks next year.  They are that awesome!
 
So give them a try!

Thursday, March 19, 2015

How to Make Rekenreks


Have you heard about rekenreks?
 
They are this awesome math counting tool.  Kind of like an updated abacus.
 
I first heard about these awesome tools when some teachers in my county studied the book Number Talks this summer.
 
If you haven't read the book.  You need to now!  Especially if you teach K-4.
 
It's quite pricey, but comes with a DVD full of videos that show great teachers using number talks in their classrooms.
 
Anyways, my kindergarten team and I started researching ways to purchase or make rekenreks.
 
So when I went to my TNCore training in February, and saw a neat make-it-yourself rekenrek, I knew that was the route to go for me. 
 
The ones pictured above were made when my TNCore training buddy and I went back to our school and trained our fellow K and Pre-K teachers.  We used school colors.
 
Are these the most durable rekenreks?
 
Probably not
 
Are they quite cost effective and easy to make?
 
Yes
 
One teacher on my team bought some awesome rekenreks from here on TpT.  They are durable and extremely well made!  If you don't want the fuss of making your own and want a durable alternative, I would definitely recommend the ones from link. 
 
But when I saw the neat rekenreks at my training, I decided to try and make my own first and see what happens.
 
So here is what you need:
 
chenille stems


fat popsicle sticks from a craft store (do these things have an actual name?)
 
You don't have to put a handle on your rekenrek, but the reason I did was so that students would turn their board around to face me instead of flipping it upside down to face me.  I wanted to make sure that they always had the same color on top as me.  I don't know if this would make a difference or not.  But it seemed like a good idea.


beads in two different colors
 
(I bought this awesome set from Amazon because I loved all the colors and knew I could use the remaining beads for lots of other things.  I love these beads because there are pearl, bright, and glitter beads in each color.)


Also a hot glue gun, sharpie, and single hole punch.


And cardstock.
 
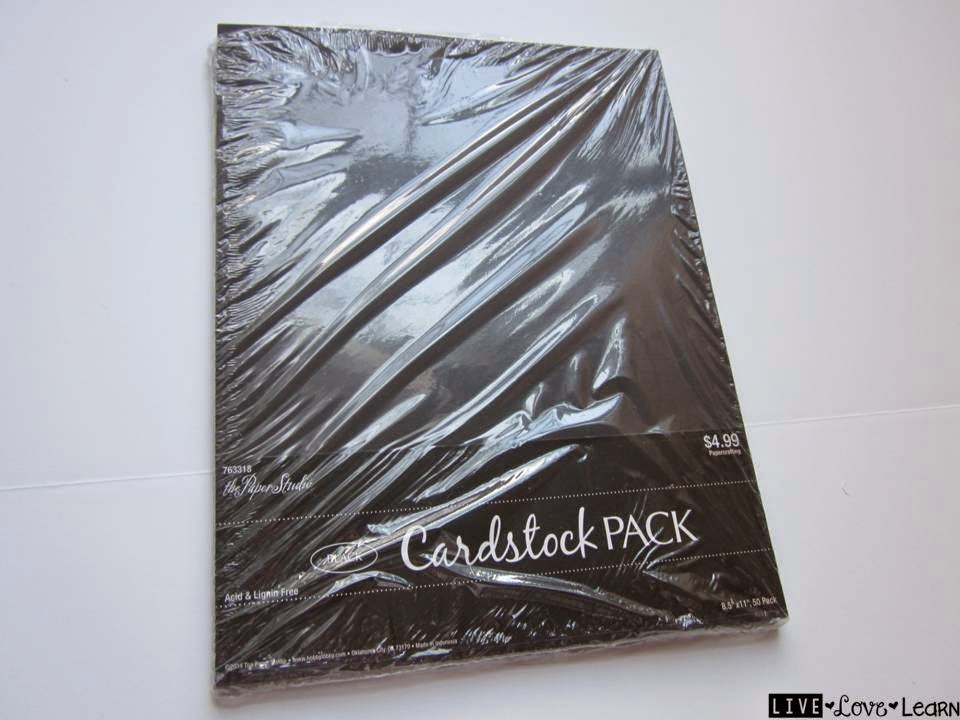
I went with black so that the bead colors would pop.  But white would work just as well too.  I bought this pack at Hobby Lobby.
 

First you'll want to laminate your cardstock.
 
You need a full page for the teacher rekenrek, and half pages (cut long like a hot dog) for the student ones.


First we're going to make the student version.
 
Lay the cardstock horizontal.


Then fold the left edge over to the right edge like you're folding a book.


Cut 2 snips right on the folded seam.
 
I cut pretty far in on both sides and left just a half inch connected in the middle.


Make 4 holes.
 
First I measured and marked where I wanted the holes to go.  Make sure you measure top to bottom.  If you hold a ruler, going top to bottom, the height should be about 4.5 inches.  I made marks at the 1.5" and 3" spots.
 
Then punch the holes.
 
This is why you want to cut the folded seam, so you can get the hole punch in the fold and punch 2 holes on the top without punching holes on the back sheet.


String 10 beads on 2 pipe cleaners.
 
As you can see, I switched this up a little.  In the example I showed above, I did 5 and 5 of each color, top and bottom.  I thought putting the colors this way, 10 of each color together, would help my kids see 10 and then add on.  We work some much with ten frames in kindergarten when introducing teen numbers, I thought this would a continuation of that strategy.
 
I'll let you know if this idea worked out or not.
 
If you teach Pre-K, you might just do 5 total beads on the top and 5 beads on the bottom.  So they can work on 5 and then add on.


String the chenille stems through the holes.


I pulled mine as tight as they would go and then wrapped the stems around themselves.


And then added a whole lot of hot glue to keep them in place.


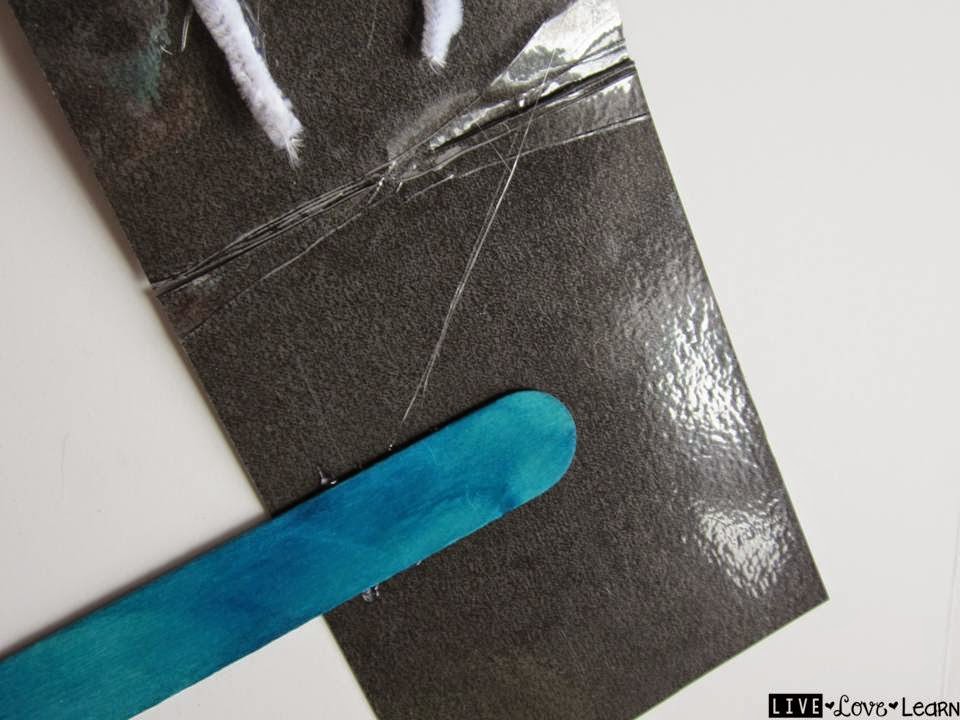
Next I hot glued the popsicle stick.
 
If you use the colored sticks like mine, make sure to check them over first.  Some were very thin, some were warped, and others were split down the middle.  If I had to do this over again, I would just use the plain wooden ones.  I've never had any issues with those before.


Then hot glue all around the edges and press the top and bottom together.
 
Here you go!
 
One student rekenrek finished!


Now I only have to make like 24 more.
 
I'm making some extras so that in case some break, I'll have extras on hand.

Now for the teacher rekenrek.
 
Take a full sheet and lay it vertical.


Fold it in half by folding the top edge to meet the bottom edge.


Make your measurements on the side again.

This time I made my marks at 2" and 3.5," measuring from top to bottom, but could have probably spaced them out a bit more.


This time you don't have to cut slits in the fold.  Just hole punch the sides.


String your chenille stems through.
 
This time they wont be long enough to wrap around each other.  So I used a lot of hot glue and glued them down to the cardstock.


Hot glue your popsicle stick down.
 
Then glue the edges all around.  But don't get the glue too close or it will squish out the sides and burn your fingers.  Yes this happened and it wasn't fun.


And here are the finished products!


I love how they turned out!
 
Of course I also love that I used two of my favorite colors!