Saturday, December 13, 2014

Christmas Gifts for Parent Volunteers


I love my parent volunteers!
 
Without them my classroom would be a little more chaotic, I would be a little more frazzled, and my kids might not get to do all the fun crafty things that require a zillion cut out pieces.
 
Every year I would try to find something cute yet inexpensive to give these parents for Christmas.
 
I am slightly obsessed with Bath and Body Works.  So last year I decided to go a little cheaper than my usual gift cards and get hand soaps for all of my parent volunteers.  I am slightly snobby when it comes to soap and the gentle foaming hand soap from Bath and Body Works is my favorite!   Around this time I also happened to see some super cute Christmas themed bow frames by Ashley Hughes on TpT and a cute poem on Pinterest.  So I thought, why not make some super cute little gift tags with the poem, to go with my soap.
 
I love random inspiration!
 
These little soap gifts were such a hit last year, I knew they would be a repeat this year.
 
First stop was Bath and Body Works!
 
Hand soaps were on sale 5 for $18. 
 
Yes please!


I purchased an assortment of my favorite scents:
Twisted Peppermint
Snow Kissed Berry
Iced Gingerbread
Winter Candy Apple
Vanilla Bean Noel
 
I also bought some of their super cute glittery gift bags. 
 
I bought 5, but these are the only colors I have left.
 
They are the perfect size for one of the soap containers.
 

And I bought some lip gloss too. 
 
Bath and Body Works sell my favorite lip gloss.  I have this lip gloss everywhere.  One in my purse, one beside my bed, one in the bathroom, one in my car, and one on my desk at school.  Slight obsession, I know.
 
I used to have a stock pile of them in a tub under my bed, but my stock pile was down to 0.  So I bought 6 more; they were having a deal to buy 2 get 1 free.

 
Next, I printed and cut out my gift tags.
 
Blue Glitter Small Gift Bag - Bath & Body Works   - Bath & Body Works


Then attached them to the soap with curling ribbon.


I used a single hole punch to punch 2 holes side-by-side at the top of the gift tag. 

 
Then I weaved the ribbon through the holes, wrapped the ribbon around the back of the soap, and tied it into a bow.


 I love the finished product!
 
So cute, yet inexpensive and easy peasy.
 
I decided to give all my soaps away this year.
 
1 went to a parent volunteer
1 went to my piano teacher
1 went to my figure skating coach
2 went to people I "elfed" at school
 
That means none left for me :(
 
Guess I'll just have to go back to Bath and Body Works and stock up on more!

Check out this freebie in my TpT store here!

http://www.teacherspayteachers.com/Product/Parent-Volunteer-Soap-Gift-Tags-1605935


Monday, December 8, 2014

Organizing my Classroom Computers


Santa came to my classroom and delivered my Christmas presents early in the form of new Chrome books for my kids!
 
They were delivered the week before Thanksgiving and I was so excited!!
 
We'd been using some very old MacBooks for awhile.  These things were so old that I couldn't even open up a PDF file on them for my kids to use these fun Computer Center Sheets I got from TpT.  Bummer.  And when I had our technology person download the latest software, they all crashed and I couldn't even open up a web browser on any of them.
 
So the MacBooks went back on the cart and my kids have been using our Promethean board, plugged into my computer, during center time instead.
 
This was not a good thing.  What if I needed to type up a quick note or answer a parent email during centers?  Well, I couldn't.  Then I'd have 3-4 kids with no center to go to.  Bad idea!
 
My administration listened to us and used some Title money to buy each kindergarten teacher 3-4 new Chromebooks.  No they aren't Macbooks, but they were cheaper.  So it came down to the difference between one MacBook per classroom or 4 Chromebooks.  Well you know which one we picked.
 
I opened up my new goodies, plugged them in to charge, and realized they looked a mess.
 

Pretty bad, huh?
 
This image is wrong on so many levels. 
  • I'm sure all those cords bunched together is against some fire code
  • Stacking laptops is usually a bad idea because they can get overheated
  • And it just looks like an unorganized mess
I just couldn't look at it any longer.


So while I was at Staples Tuesday night, I picked up this hot pink file sorter!
 
$20 of pink, organizational awesomeness.
 
(I love Staples, but my wallet cries every time I walk in the door.)
 
I thought it would be perfect to help me organize my new mini laptops.


This is how it looked right out of the box.


Super easy to put together.


Wait for it...


TADA!!!
 
So pretty!
 
And so nicely organized.
 
I don't have to look at the cords anymore, because they are plugged into the surge protector, which is now on the floor behind the cabinet.


View looking down behind the cabinet.


I'm not sure if it would be strong enough for our old super heavy and thick MacBooks, but for these mini sized laptops, it works perfectly.
 
If you do have the bigger, thicker, heavier laptops, I would suggest a black mesh metal file sorter like the one I used to use for my MacBooks.  (I got mine from Walmart or Office Max)
 
How do you organize your classroom laptops?


Saturday, December 6, 2014

Countdown to Christmas

The first week of December has come and gone.
 
So I thought I'd share a neat idea I pinned on Pinterest last year.
 
When I checked back to my original pin, the blog was no longer found.  Sad day.  This is such a neat idea that I wanted to make sure and share it with others.
 
The original pin was from a mommy blog.  Before the end of November each year, she'd collect 24 of her children's favorite Christmas books and wrap them up like a Christmas gift.  Then, each night, one of her children would get to pick out a book, unwrap it (the best part), and that book would be their nightly read aloud.
 
Great idea!!
 
And so easy to modify for a kindergarten classroom.
 
I tried this last year, with some modifications, and my kids LOVED it.  So of course I knew that I'd be doing it again this year.
 
I have 20 students.  So I chose 20 of my favorite Christmas books.  I purposely did not choose ones that I like to use for special projects, like most of my gingerbread books were reserved for gingerbread week and I didn't wrap How the Grinch Stole Christmas because I knew we'd be having a Grinch day. 
 
Our last day of school before Christmas Break is December 19.  So I'd have only 15 days of school and 20 books. 
 
No big deal.
 
Some days if we have a little extra time, I'd pick two names.  Other days that were a little bit busier, I'd only draw one name.
 
The biggest thing for me was that I wanted to make sure my kids understood that these were my books.  I just wanted to have a fun way of letting them pick out books for us to read.  So even thought they were choosing and unwrapping the book, when we were finished reading, it was going back on my shelf.
 
(I actually bought each of my kids a book for Christmas so during our Christmas party they will get to unwrap a book that will belong to them.  They don't know that yet, of course.)
 
First thing I did was type up all my students names on a word document and print it out.  The names then went in a little container I bought at Dollar Tree this summer.


I could've just written the names on scraps of paper, but typing the names in Word was probably faster and they look a little nicer.
 
Then I picked out my 20 Christmas books.
 

I brought them home over Thanksgiving to wrap.


I found all of these wrapping paper rolls at Wal-Mart last year.  They came 2 or 3 to a pack, I can't remember.  But there was enough to wrap last year's 23 books, this year's 20 books, and a little extra left over for next year.  I'm sure I'll have to buy more next year though.
 
I just love the bright fun colors!


I am actually a terrible wrapper.  So I commissioned my mom to wrap for me. 
 
I bribed her.


Finished and ready to go back to school!
 
There are no embellishments on these book gifts.  No bows or ribbons, just wrapping paper.


  I wanted my students to be able to tear open these books pretty quickly and the books probably wouldn't have all fit in my little Disney shopper tote with bows and such. 
 
I love this little tote from the Disney online store.
 

Fits perfectly between my cubbies and rocking chair.
 
Before starting, I explained to my kids that these were my books.  They would get to choose which one they wanted, unwrap it, I would read it, but then it would go back on my bookshelf.  I explained that I thought it would be a fun way for them to get to pick out which Christmas books we read each day.
 
They were cool with it and totally understood that even though they unwrapped it, the book was still mine.
 
I was a little worried about how well my students would understand that concept last year when I first introduced this idea.  I was fully prepared for tears and questions of why they couldn't take their book home.  But they all understood and we had no issues.
 
So I knew my kids this year would understand as well.


This little guy's name was drawn first!

He was so excited!


This was a brand-new book I just received from Scholastic, so I was excited to read it too!
 
My kids are loving this Christmas tradition.
 
When I get ready to pick out a name, my kids are the quietest I have ever heard them.  They are anxiously waiting for me to call their name.
 
And if I don't pick out their name, they are perfectly okay with that, because they know that their name is still in my basket and they will get a turn, just maybe not today.
 
Try it in your classroom and let me know what you think!


Friday, November 28, 2014

Veteran's Day & Thanksgiving Activities

What a month!!
 
I always say that the busiest times for a teacher are the first month of school, the last month of school, and the time in between Halloween and Christmas.
 
Throw in the fact that I've been sick, twice, and took a weekend trip to Disney for a race, and I'd have to say this November has been quite exhausting.  Thank goodness for Thanksgiving Break!
 
I plan on doing a pretty lengthy post later this week on my Disney trip.  But for now, I want to share what my class has been doing in November.
 
First let's start with our November stained glass window art.
 
Fall leaves!
 
 
In case you don't remember me saying before, I got the idea from Maria Manore's blog, Kindercraze.  What a great idea and so easy!  I have an entire wall of windows, so I thought it would be fun to have the kids make different ones for each month of the school year and display them on our windows. 
 
Click here to see previous month's window art.
 
 
Veteran's Day
 
I love these cute Veteran's day craftivities I found from Miss Kindergarten.  Hers are always my favorite.  I love that I can work some thematic art and writing into my day. 
 
I love, love, love invented spelling and think it is the sweetest thing ever!
 
 Thank you for saving the day.


Thank you for keeping the world safe.
 
Sweet words from innocent hearts.  Love them!
 
 
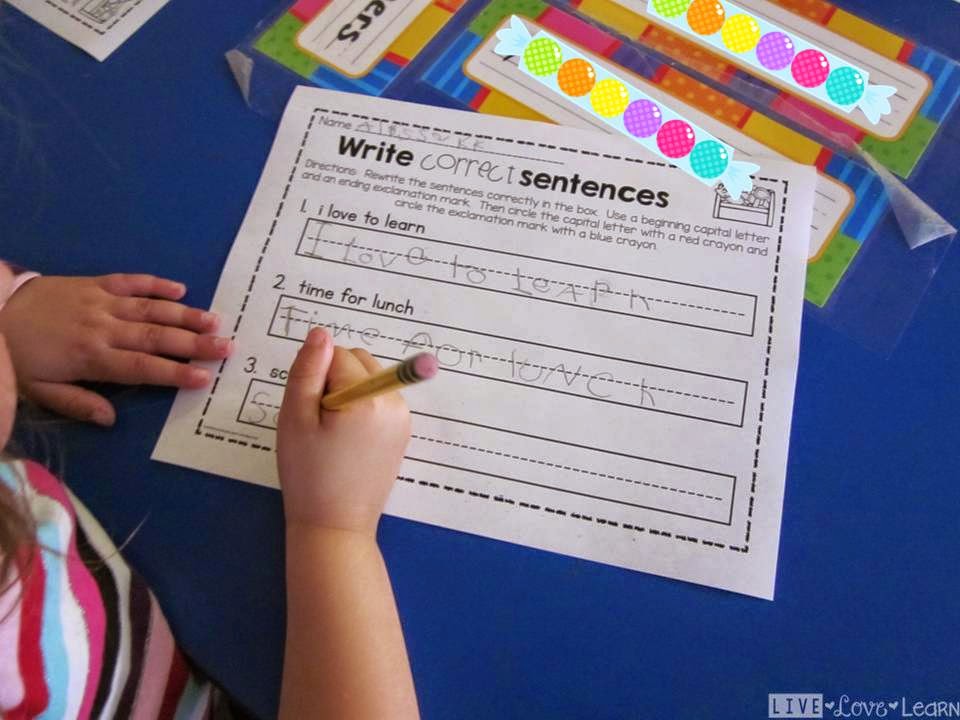
We also started working on identifying and writing complete sentences.
 
 First we learned about the tools to construct a great sentence.
 
*Begin with a capital letter
*Leave finger spaces between each word
*Use correct punctuation at the end
 
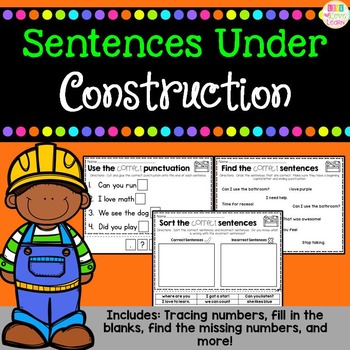
I found the cutest construction worker clipart from Creative Clips.  And when I saw it, I knew that it would go perfectly with this set.
 
I also made some punctuation anchor charts to match.
 
Then we practiced.
 
A Lot!


My kids have done so well with this set.  Click here or on the picture to check it out.
 
http://mcdn1.teacherspayteachers.com/thumbitem/Sentences-Under-Construction-1530202/original-1530202-1.jpg
 
Now let's get into some Thanksgiving activities.
 
We started off with a little I Spy - Thanksgiving Words.
 
I've LOVED making these I Spy sets.  It's a great opportunity for my kids to work independently on identifying letters, good handwriting, and seasonal vocabulary.
 
I did buy 6 jumbo magnifying glasses from Lakeshore at the beginning of the year.  So that may or may not have had anything to do with why I made these sets.  My kids had been eyeing them, so I figured I'd make them a fun paper to use them with.  One set quickly turned into 6, with more in the works.
 
What can I say, my kids love 'em.


I have no idea where this turkey pattern came from.  Probably left in a file from a teacher long ago.  But I love it, so I use it every year.

 
Love this next activity. 
 
I think I may have seen it on Pinterest but I'm not completely sure. 
I made a template to match whatever I originally saw.
 
We made these right after we read "A Plump and Perky Turkey."  I love that story!  If you haven't read it, you need to like now.  And this activity goes perfectly with it.


I made these Save a Turkey posters to go on our bulletin board.  I like to change my big bulletin board out each month.
 
So cute!
 
Next up is another Miss Kindergarten craftivitiy.  I told you I love these.
 
I let my kids pick which pie they wanted to make, apple or pumpkin.  Then they wrote 3 ingredients for their perfect pie. 
 
I love their answers...
 
http://www.teacherspayteachers.com/Product/Sweet-as-Pie-Craft-and-Writing-Templates-403692
 sugar, cream, powder
 
http://www.teacherspayteachers.com/Product/Sweet-as-Pie-Craft-and-Writing-Templates-403692
seeds, cream, crust 

http://www.teacherspayteachers.com/Product/Sweet-as-Pie-Craft-and-Writing-Templates-403692
 apples, seeds, cream
 

http://www.teacherspayteachers.com/Product/Sweet-as-Pie-Craft-and-Writing-Templates-403692
 caramel, chocolate, ice cream
 
So precious!
 
They were so cute that I knew I had to display them as well.
 
So this happened...
 
 
This bulletin board looks like a hot mess! 
 
But I don't care.
 
Next up was the story of the First Thanksgiving.
 
I found this bracelet activity my very first year of teaching, nine years ago.  It came from a website that was my go-to website for fun seasonal, thematic, literacy, or math related activities.  Basically I stalked this website.  I haven't been to it in awhile, because I've printed out everything I want, but you should totally check it out.
 
Turns out the teacher who originally created it decided she was going to take it down.  A to Z Teacher Stuff stepped in and is now maintaining it.  Thank you! 
 
I guess they knew what an awesome resource this website was as well.
 
Click here to go to the main website.
 
Click here to check out the Thanksgiving story bracelets.  (You'll have to scroll down a bit but the content is still there.)

I just copied and pasted the content onto a word document and then printed it off so that I could keep it with my Thanksgiving activities.
 
I forgot to take pictures of how I prepared these bracelets.  Whoops!
 
I had a parent count out enough of each colored bead for an entire table, I have 5 kids at each table, and put the beads into a ziplock baggie.
 
Then when it was time to do our activity, I emptied each bag onto a paper plate and put a plate in the middle of each table.
 
We used black pipe-cleaners for the bracelets. 
 
I've done this activity for nine years and I've used plastic cord, yarn, and pipe-cleaners.  Pipe-cleaners are by far the easiest for little ones. 
 
They lay straight, hold the beads in place so they don't slide off onto the floor, can easily be snipped and twisted to make the shape of a bracelet, and are easy to take off.
 
The idea behind this is that each bead represents a part of the story of the first Thanksgiving.  We tell the story together as a class, while we build our bracelets.  Then I let the kids practice telling each other the story and challenge them to go home and use their bracelet to tell their parents the story of the first Thanksgiving.

 
We made these on Monday and most of my students wore theirs again on Tuesday.
 
My first year of teaching I had a little boy who still wore his in the spring.  I used yarn that year, so he was able to slip it on and off his wrist.
 
The story of the First Thanksgiving would not be complete without an actual feast.
 
This is an annual kindergarten event at my school.
 
The kindergarten teachers make the turkey and we send home requests for other Thanksgiving food items.  I may not be domestic in the kitchen, but after nine years of making a turkey in a crock-pot, I've got this down.  And it's really, really good, if I do say so myself.


A few days before our feast, I write Native American and Pilgrim on slips of paper and have the students choose a paper out of a cup.  Then I send home a note telling the parents which one their child picked.  I try to make the numbers even.
 
This year I have 20 kids, 10 are girls and 10 are boys.  So it worked out perfectly for the feast that I had 5 girl pilgrims, 5 boy pilgrims, 5 girl Native Americans, and 5 boy Native Americans.

 My Native Americans wore feather headbands.  Gotta love sentence strips, they are so multi-purpose.
 
One of my kids asked why Indians wore leaves. 
 
Cracked me up!
 
 These pilgrim girl hats are so easy to make from a long sheet of white construction paper.
 
And then pilgrim boys of course. 
 
We had a fabulous classroom feast.  I had awesome parent volunteers who made food and showed up to help. 
 
Thank you to all the parent volunteers.  This feast could not happen without them.
 
I hope everyone had a wonderful Thanksgiving.
 
Now let the Christmas chaos begin!