Wednesday, August 6, 2014

Word Wall Update!

As I walked out of my classroom at the end of last year, I looked around and thought I was content with how everything looked and was organized.  Of course everything was packed up and it looked like this...
But I was happy with my posters, anchor charts, behavior chart, etc.  So I thought that when the time came to set everything back up, I would just put everything back where it belonged and leave everything on the walls alone.

Boy was I wrong.

Sometime during the first week of summer, I decided my room needed an overhaul, like yesterday.  When I took a moment to stop and think about it, most of my posters, borders, and bulletin boards were several years old.  And due to my one wall that is almost completely windows, all of those things were looking a bit faded.  I guess I just hadn't noticed because I had forgotten what they originally looked like.

So I worked like a busy little bee all summer make things and laminating things for my classroom, so that when July came, I would be ready to redecorate my room.

I will do a complete classroom tour soon!  Even though I've been back in school for 2 weeks already, I am still tweaking a few things.  Stay tuned.

So today I'm going to share a little bit of my room and one of my biggest overhauls of the summer.  

My word wall. 
I've been using this word wall, which is actually 2 bulletin boards that sandwich my Promethean Board, for about 5 years.  I knew that I wanted to condense down to just one board and wanted to make sure that it was in a location where all students could see it.  I also wanted something different, in terms of words and header cards, I just couldn't find exactly what I wanted. 

So what do you do when you can't find what you want?  
You make it yourself.
So I did.  

I spent some time this summer and created 2 Word Wall sets that include header cards and editable word cards.  The 2 sets are completely the same except for the background.  One set has a crayon scribble background and the other has a cloud background.

 http://www.teacherspayteachers.com/Product/Word-Wall-Header-and-Editable-Word-Cards-Crayon-Scribbles-Pattern-1299304

 http://www.teacherspayteachers.com/Product/Word-Wall-Header-and-Editable-Word-Cards-Crayon-Scribbles-Pattern-1299304

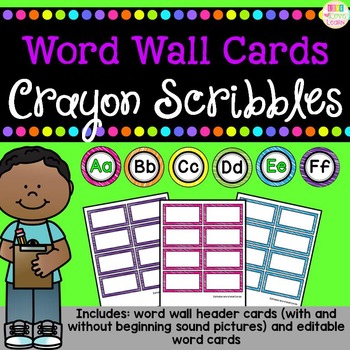
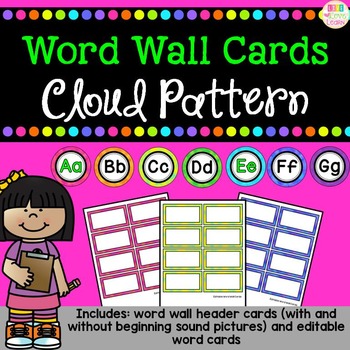
Each set comes with large header cards (with beginning sound pictures and without) and medium header cards (with beginning sound pictures and without)

I teach kindergarten, so I decided to use the set with the beginning sound pictures.

I also made editable word cards with different colored borders.  I hate buying a set of words, printing all of them, and then not using some because we don't teach those words.  So I made all the word cards blank and editable so that everyone can type in the words they need and use the font they want.

I also made sure that words beginning with the same letter had different colored borders.


I really love both sets of word wall cards, but I went with the cloud version.


Next came the printing and laminating.  Which was a breeze thanks to my new laminator "hot stuff."  I seriously love that thing.  It's even light enough to carry back and forth from school.


Here he is laminating my new center cards.  Yes I am laminating while sitting on my bedroom floor. Doesn't everybody laminate that way?

I had picked up this awesome coupon organizer from Walmart during my last grocery shopping trip because I thought it would fit my word cards perfectly.  And I love the colors!

 It came with little divider tabs, letters on one side and months on the other.  I could definitely cute these up, but that is so not a priority at the moment.

After cutting everything out, it was time to sort by beginning letter.

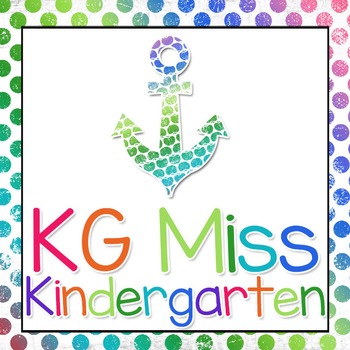
I forgot to mention that the font I used was "Miss Kindergarten" by KG Fonts.  I love KG Fonts and they are a free download on TpT for personal use.  I just love this font!

 http://www.teacherspayteachers.com/Product/KG-Miss-Kindergarten-Font-Personal-Use-1310872

I also made some matching digraph mini headers.  

My kids always get so confused when they are looking for a word on the word wall that begins with a digraph.  So I made these little mini headers to go under the letter header, to help remind the kids which 2 letters make the sound.  I'm hoping this will help.  Especially with th words and sh words.

Phew!  There are more w words than any other beginning letter.

I slipped the digraph mini headers down in the letter sections with the words that began with the same letter.  I'll put the digraph headers up when I introduce a word with that digraph.

These cards fit so nicely in my new coupon organizer!!  This makes my OCD very happy!

Here are the word wall header cards I chose.  It's a little difficult to see the cloud pattern but it's so pretty.  In addition to the beginning sound pictures I added to some of the header cards (there is a complete set of header cards without these beginning sound pictures) I also added a short and long beginning sound picture for each vowel.

Header cards - check
Word cards - check

Time to start working on the actual word wall board.

First stop was Hobby Lobby.  I bought some great sparkly ribbon for 50% off.  I actually used the thinner version of the lime green ribbon on the top in the picture.

This was the worst part, and took forever because I had to get it just right.

You can even see my measuring tape pinned to the board on the far right so that I could measure my horizontal ribbon stripes.

So glad that parts over!


Oh this word wall makes my heart happy!!

Where do I even begin...the bright colors, the sparkle, the new chevron border, the perfectly spaced grids, not to mention my new and improved reading center, Book Nook, right in front with my awesome chairs from Target and my new rug from Big Lots.

I purposely changed my word wall to a different board so that I could put up seasonal writing activities on the board in front of my writing center, Write Site.  I also wanted it to still be easily viewed from the students' tables and Write Site.  As an added bonus, it is now in front of Book Nook, so I added some fun pointers so that my kids could practice reading the words while they are at Book Nook.

Another view.  And look!  We added our first popcorn word to our word wall today!

If you've seen my blog before, you may know that I am slightly obsessed with bulletin board letters.  So of course I had to use some of my new ones to label my Word Wall.


It's the little things that make my heart happy.  And this is definitely one of them!

I also used my new Subway Art Rule Charts on my calendar mtg board.  (They are FREE!) I just attached them to some sparkly chevron scrapbook paper.  Right now they are being held up by magnets, the whole board is magnetic, because I'm not positive I'm going to keep them that way.  

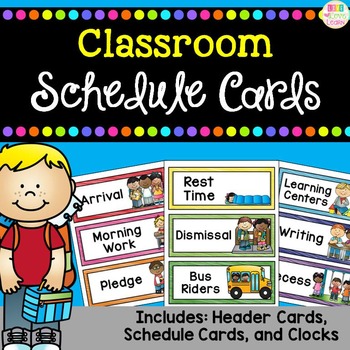
Oh and can you see my new schedule cards on the left.  Those make my heart happy too!

http://www.teacherspayteachers.com/Product/Classroom-Schedule-Cards-1351147 


 Pretty!

 Stay tuned for a classroom tour coming soon...

Tuesday, July 22, 2014

I Heart Erin Condren!

Today I thought I would share with you a little bit about my favorite teacher planner.  There are many great ones out there.  This one just happens to be the best one for me.

If you have never heard of Erin Condren, you need to check out her website, like yesterday.  (Click here to check it out now!)

I honestly can't remember how I found out about her site, but it was definitely love at first sight!  (Haha, site/sight, get it?)  She has lots of awesome stationary products.  (In addition to my teacher planner I also own one of her Life Planners, which is the planner I use to plan my daily life, and 2 notebooks, regular notebooks with a calendar in the front and a folder pocket in the back.)

One of the best things about her products are that you can personalize them!  Love it! 

This year she offered a lot more cover options for her teacher planners.  The picture above is from my planner last year.  This was my first ever Erin Condren planner and it got me hooked.  Click here to see more of the teacher planner covers.

I love looking at my teacher planner and seeing my name and my school's name.  It's the little things that make me happy!


The inside has pages for events and volunteers as well as substitute information. (I have a separate binder for my substitutes, but I filled out this page anyway. Just in case)

Then there is a 2 page spread of holidays and dates to remember for the school year.  (She includes the birthdays of some special children's authors too)

There's a 2 page spread for you to write all of your kiddos' birthdays.  I love that this planner keeps everything right where you need it for easy access!

There are also pages to write down a student's absence.  (I didn't use these pages last year, I should probably think of another way to use them though.  Let me know if you have any ideas on that.)

Next comes some of my favorite, and obviously most used pages.  These graph pages are awesome and can be used for so many different things!  I used mine to plan out my seating chart and center groups every 9 weeks.  I used to just plan my seating chart and groups out on a piece of notebook paper.  But I love that by using the pages in my planner, I can keep track of which students had sat beside each other or had been in the same group before.  This definitely helped me to mix things up.

This is a 2 page spread of your year at a glance.  I used this last year to write in special events and parties.  This year I've already used them to plan out all of our reading and math units for the entire school year.  Well actually, our county plans these things out for us and we follow their pacing guide.  But I wrote out what we would teaching each week according to our pacing guides.

Now we get into the actual calendar pages...Unlike other planners that I've had in the past, all the monthly calendars are together in the front of the planner.  

As you can tell, I like to use washi tape to show when we have school breaks.  I love me some washi, check out ETSY for some awesome patterns.


Each month has notes pages directly following the calendar.  I used these notes pages when my grade level teachers and I were planning out special events.  I liked having them in the planner because I didn't lose them.  And the next time we had a grade level mtg, they were right there ready to go.


And here are the actual planning pages. 
The days of the week are written vertically down the left side.  There is some space for you to write the date and special info.  (This is where I would remind myself if I had bus duty or a special activity that day)
Across the top are columns for you to write a subject and time.  Oh and that's a removable book mark in the center of the planner with the apples on it.   Love that thing.  Helps to find your week so quickly.

I actually don't write my lesson plans in my planner...gasp!  
I type my plans on the computer because it's so much quicker and easier.  I have a template, available for free on my TpT store here, I modify the template each year to fit my schedule.  This way I don't have to write in special classes, lunch, recess, etc each week.  I just fill in what I'm teaching because the other things are already there.  This saves so much time.

So why in the world do I have this big honkin' planner when I don't even use it to for my lesson plans?  I actually use it to write lists.  I am a crazy list person.  I usually have at least 5 lists going on at the same time.  I was going through a zillion post-it notes a day, then the notes were getting lost, or I would accidentally throw it away.  Just wasn't working for me.  By writing my lists in my planner: I don't lose them, I can look back at a previous week (or year) to see what was going on, I can plan ahead by writing lists way in advance (I do this to plan the days up to an event or report cards)

So this is how I use my planner.  I write things I need to do on a particular day in the left 2 boxes, the 3rd box is where I write things I need to plan.  
Instead of planning everything on a Friday night, or Sunday afternoon...you know who I'm talking about, I plan a few things each day.  So Monday I usually plan the next week's morning work, math, and phonics; Tuesday I plan the next week's reading and centers as well as print my plans and email them to my principal; Wednesday I type my Friday Newsletter; Thursday I copy my Friday newsletter along with any special notes about parties or events; and on Friday I fill all my Daily Work Organizer Drawers with my work for next week.  Click here to see my free labels for my daily work drawers.  They are super cute!

On the right side of the 2 page spread I write after school activities in the first 2 boxes (faculty mtg, parent conferences, etc) and my assistant's "to do" list in the last box.
You can obviously use these pages any way that works best for you.  I sure did :)

Next we come to the checklist pages.  Love, love, love!

Are you constantly checking things off for your kids?  Who didn't send back homework, who hasn't turned in their field trip permission forms, etc.

This page is a lifesaver!

Just write your kids names on the lines on the left side.  Then when you are collecting something, write the title on the top of the column and check off the kids.  (I think this is actually supposed to be used for recording grades, but I teach Kindergarten and we don't give A, B, C grades, so I use it for my checklists instead)  


Stickers!!!!

Can you tell I teach kindergarten?

There are 2 pages of preprinted stickers for you to use on your monthly calendar pages.  They say things like faculty mtg and IEP mtg.  These stickers really help important things stand out on your calendar pages


But...wait for it...
There are also blank stickers!  So you can write anything you want on them!  

I like to use the same color stickers to represent faculty mtgs, conferences, bus duty. etc.  This helps me to identify the sticker color with the event.
You can also have stickers printed with your own events typed on them.  But those cost a little extra.
So, if you're like me, you get all these random notes and papers.  You don't know where to put them, so you shove them in your planner.  Then when you pick up your planner, they all fall out.

Not anymore!  There is a 2 sided pocket folder bound into your planner.  Fabulous idea!


Next up there is a clear plastic sleeve.  Like the ones you put in binders but way better.  They are made of a thicker plastic and are also bound into your planner.  

The teacher planner comes with 1 of these plastic sleeves, but I pay a little extra to have 2 more put in.  Totally worth it.  I keep my encore schedule, bus duty schedule, RTI schedule, and other important things that I may need to look at throughout the year in them.


A little plastic pouch also comes in the back of the planner.  I like to keep extra post-it flags, rubber bands, and paperclips in it.

And here's the super cute back cover!
These planners are simply the best, for me.  Definitely not for everyone and I can see how it would be a little overwhelming if you aren't totally OCD like me.   
And these things are not the cheapest, the starting price is $59.  You could absolutely find a much cheaper planner that has monthly and weekly calendar pages from Walmart or Office Max.  But its the little extras that I love about this planner: the stickers, the bright colors, the pockets, the checklist pages, and I cannot forget to mention how much I love the personalization.  They make the price totally worth it for me.

Hint:  Erin Condren always throws a teacher sale in May.  I buy my teacher planner in May and get 25% off.  This year I also got a free t-shirt that matched the cover of my planner.  So if you like her stuff, make sure you sign up for her newsletter so you can find out early about special sales and new releases.

I am going to leave you with pictures of my new planner for the 2014-2015 school year.  
Once again, I am in love!


And yes, I started school today.  My summer is officially over.

Sunday, July 13, 2014

Back to School Goals

Today I'm linking up with Jess over at I Heart Recess!


She is having bloggers link up with their back to school goals.  Since I will begin the 2014-2015 school year in exactly 8 days, I thought this would be a great time to reflect on last year and set some goals for this year.

So here it goes...


Do you have any specific goals for this school year?  
Let me know in the comments below.

Now hop back over to Jess's blog and see some other back to school goals!