Saturday, April 18, 2015

Plant Buddies

One of the great things about spring, other than warmer weather, is seeing all the trees and flowers finally come back to life.  Even though I'm allergic to all of them, I still think they're beautiful.
 
When I first started teaching kindergarten, almost a decade ago - yikes!, we planted seeds and watched them grow. 
 
Or at least we tried.
 
I seriously have a black thumb.  I can keep any animal or pet alive, but not a plant.
 
So after a few years of will the plants grow or wont they grow, I decided to give this another go.
 
First, we read up on all things plant related.
 
Including this awesome set from scholastic.
 

These are the same kinds of books as my ladybug book that we used for all of our ladybug activities.  Check those out here.
 
I really love this style of nonfiction text for Pre-K and Kindergarten because the photographs cover an entire page and there isn't too much text.  Just the essentials.


Then we made our monthly "are, can, have" chart.  I forgot to take pictures of the finished products, so I'll add those in later.


I found the cutest idea for planting grass on TpT.  It's a little Mr. Potato Head themed plant from Little Priorities.  Check it out here.  It had little eyes, ears, noses, mouths, and feet pieces.  I copied them on cardstock, cut them apart, and put them in labeled baggies.
 
I decided that planting our plant buddies during centers would be easiest on me so that I would only have to do three students each day.  So plant buddies was our Art Mart center this week.
 

I had all the little parts, clear plastic cups, and a sharpie to write names on cups in the center tub ready to go.  And there's a little bit of potting soil down in the bottom too because I make a mess every time I scoop out some soil.


I went to Walmart and bought our other necessities.  I purchased a special seed starting potting mix and grass seed.
 
I honestly had no idea what to buy in the gardening section at Walmart and was a bit overwhelmed.  I've heard that grass can grow in almost any conditions so I chose grass seed.  Plus, I thought it would look cute for their plant buddy to have grass hair.  Like a chia pet!
 
In the picture you can also see the cup I used to scoop out the potting soil, a pencil I used to stir up the seeds and soil, and another cup I used for watering.  I'm very savvy when it comes to gardening and gardening tools, not!  Haha!


I just love how they turned out!!
 
So adorable.
 
I did used hot glue to attach the paper pieces to the cups, I figured it would be easiest and quickest.


I was getting concerned because we started planting these last Thursday and by Wednesday none had started sprouting!  Plus it rained all week, so there was little sunlight coming through my windows, and our air conditioning kept breaking, so it felt like a tropical rainforest in my room. 


Then on Friday I came in and saw a few little sprouts finally popping up...and MOLD!  Yuck!
 
I was afraid of messing up the little grass sprouts, so I didn't try to mess with the mold.  I don't really know if I should leave it or try to scrape it out.  But the grass it growing despite the mold.


Yay finally!!  I really was getting worried that I had killed the grass.


The ones planted on Monday and Tuesday still haven't started sprouting, but I'm a bit more hopeful now that I'll see them poking up from the soil when I go back to school Monday. 


On a side note.  We finally were able to work on our April stained glass window art. 
 
I love these cute umbrellas!
 
They are perfect the rainy spring we've had so far.


Next week we will be working on Mother's Day!  I found the cutest craft and writing activity, so I'll share all about them and showcase our finished products.
 
Yes, I like to get things done early.
 
So stay tuned!


Wednesday, April 15, 2015

April Activities

Today I thought I would share random things going on in our classroom in April!
 
First up we had Easter!
 
I actually came down with strep the Wednesday before Easter.  So I missed our Easter party that Thursday :(  Luckily we had made these really cute Easter crafts earlier that week.
 
This was actually a combination of two ideas I saw on Pinterest.  You can check the original pins out here and here.  I found both of these pins about 2 years ago and thought they would be super cute together.
 
And I think the result is pretty cute!
 

The bunny was made from painting each child's ring finger, index finger, and palm.  This year I added a little glitter, but you can't really see it in the picture.  And then used a sharpie to add the eyes, nose, mouth, and whiskers.
 
The picture was taken in front of a table cloth I bought from Walmart years ago.  I just hung it up on clips in the hallway and had each student stand in front of it.  I used a fat popsicle stick, three white pipe cleaners, and a big pink pom for the nose and whiskers.


This year I've made it a point to have my students make some kind of stained glass window art to decorate our windows.  The kites are actually from March, but we had two weeks of spring break in March and I got sick with strep last week.  So even though its almost the middle of April, they are still up.  We are going to make umbrellas next week.  The umbrellas are all cut out, we just have to make them and hang them up.


I have two bulletin boards in the hallway.  The big one is switched out each month. This month it has my grouchy ladybugs I blogged about a few days ago. 
 
 
The small one is where I showcase my student of the week. 
 
 
Well I was pretty consistent with sending home my student of the week pages this week and actually finished all my students before spring break.
 
So I decided to print out some pictures from our school year that have just been sitting on my computer and showcase them on the bulletin board.
 
I included an individual picture of each student, along with groups shots from parties, field trips, literacy night, 50's day, 100th day of school, etc.
 
This bulletin board is a huge hit with my students and parents.  Every time we walk down the hallway, my kids get so distracted.  It's a little better now, but when I first put the pictures up, I felt like I had to drag them away from it so we wouldn't be late for lunch every day.


I just printed out clipart of letters and cameras to make the bulletin board pieces.  It was so easy!
 
At the end of the year, I'll send the pictures home with my students.
 
This is my favorite picture from the board!
 
 
This is my awesome kindergarten team on book character dress-up day!!
 
It may be April, but my brain is already in End of the Year overload. 
 
I have a list of everything that needs to be done before the end of the year.  So many of these things can be completed now, I just usually wait until the end of the year.  So I figured, why not do some of those things now, so that I won't be as stressed at the end of the year.  So for the past 2 weeks, my goal has been to check 3 things off my end of year list each week.  This week I actually checked off five things, and I had bus duty.  Woo Hoo!
 
First up were pictures for the front cover of our End of Year Memory books.  I found this idea from a super cute pin on Pinterest.  See the original here. 
 
I actually found this pin last summer and kept it in the back of my brain for this exact purpose.  I even went ahead and bought cheap sunglasses from the party section in Walmart last summer.
 
Well, the stars aligned this week, and we had perfect weather, all of my students were present, and one of our kindergarten teachers has a super crafty and artistic student teacher!
 
So during recess Miss Maggie worked her magic with the sidewalk chalk.
 
Then I took a picture of each student individually, wearing the sunglasses of their choice, I did have to stand on a chair to get the picture right though. 
 
But they turned out super cute!! 


Miss Maggie did such a great job that I thought "hmm" we could get a cute group picture in front of the chalk writing too!
 
So we did!


I ended up using this group picture on our class autograph page that goes on the back cover of our Year End Books.
 
I will show examples of my Year End books in a few weeks.  They are almost all put together!  But I'm still trying to decide exactly how I want to format the front cover with their individual pictures.
 
This is basically what my front covers have looked like for the past 8 years.


But I'm thinking it might be time to change things up.
 
When I make up my mind, I promise I'll show it!
 
So stay tuned!


Sunday, April 12, 2015

All About Ladybugs

I take pictures of my class All. The. Time. 
 
We make a grade level slideshow and a classroom slideshow every year.  So I take lots of pictures to include in both of those.  If you want to make a classroom slideshow but don't know how, check out my six part series I made last year here.
 
So anyways, I was looking through my recent pictures and realized that there was a reoccurring  theme...ladybugs! 
 
The ladybugs weren't all planned out, they just happened.  I guess when I think spring I think ladybugs.
 
So bring on the ladybugs!
 

First we read a nonfiction book about ladybugs.  This was part of a bugs pack I purchased from Scholastic a few years ago.  I love these nonfiction books for little learners because the pictures are nice and big and there's just the right amount of text.


Then we made a flipchart on the Promethean board where we listed things that ladybugs are, can, and have, based on what we read from the book.


Then they recorded one fact for each part onto their pages.


Obviously this little guy was thinking hard!


Then we made ladybugs.
 
I didn't provide a pattern for this one.  I just showed them the general idea of how to cut and let them have at it.


I've come a long way and now love to let them cut their own art projects.  We don't do it all the time, but when we do, I love how everyone's is different and unique.


While they made their ladybugs, I was showing step by step using my document camera. 
I love that thing!


Then I stapled the fact pages to their art projects and hung them up on the blinds.  If you've never seen my classroom, I have an entire wall of windows and blinds.  I finally got smart a few years ago and starting hanging things on my blinds just like I would if there was a wall there.


It was really sunny, so the picture below is a bit dark.  But I wanted to show what the ladybugs looked like when they were all hung up.


Then we practiced subtracting with ladybugs!
 
These work mats and counters are part of my Composing and Decomposing Numbers set.  I just modified it to include a space for a subtraction sentence.  I will be updating this set this summer to include the subtraction sentence.  I absolutely LOVE this set.  I used it when we were composing and decomposing numbers back in the fall, then I used it again to teach addition in January/February, and now I'm using it to practice subtraction in April.


I like to use these work mats in partners.  I found this Peanut Butter and Jelly Partners idea from DeeDee Wills.  I can't remember if it was on her blog or instagram, but I already had some PB and J clipart, so I whipped up my own page.
 
And I love it!  It is so much easier to explain to my kids what to do when I say "Peanut Butter does this" instead of "Partner A or Partner 1 does this."


I can't remember if I talked about partners before, but their partners are actually elbow partners.  I specifically place my kids at their tables so that they will have a partner beside them that they can work with.  Typically my Peanut Butter will be my higher learner or my leader, and my Jelly will be my partner that needs a bit more support or might be a bit shy.
 
This page hangs on my wall.  You can see my center chart to the left and our classroom schedule to the right.  We do partners everyday, not necessarily as elaborate as work mats, but at least some kind of quick activity so they wont forget who their partner is and so that they can practice working together.


For this subtraction activity:
 
Peanut Butter was in charge of putting the ladybug counters on the left leaf.  While Jelly was in charge of getting out a marker and eraser-sock.
 
Jelly wrote that we were starting with 10 ladybugs.
 
Then Peanut Butter moved some ladybugs to the right leaf.
 
Jelly counted the ladybugs that were moved and wrote the number in the second blank.  Then Jelly counted how many ladybugs were left on the left leaf and wrote the answer in the blank.


We did these step by step together where I would call out the next direction for each partner.


Then we went around the room and Peanut Butter called out their subtraction sentence.


Peanut Butter then moved all the ladybugs back to the left leaf.  Jelly erased the number sentence.  And we switched roles and did it again.


Clean up is super easy with partners too!

Peanut Butter was in charge of wiping the numbers off the work mat and putting away the marker and sock.

Jelly was in charge of putting the ladybug counters back in the bags and bringing the bags and work mats to me.

Everyone had a job and clean up was quick and efficient.

They love these work mats.  And I love to use them as a quick review at the beginning or end of the lesson.
 
Next up was my April bulletin board. 
 
I found this super cute idea on Pinterest here.

First we read "The Very Grouchy Ladybug" by Eric Carle.  I couldn't find my book, so I did a quick YouTube search and some guy read it to us.  He was very animated.
 
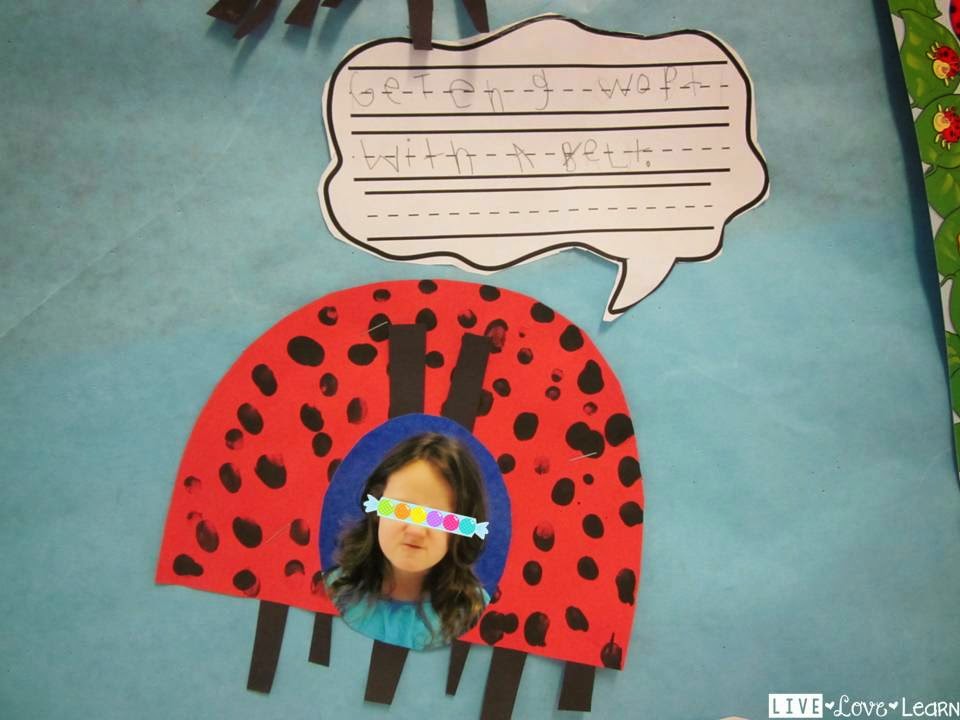
Then I took a picture of each student showing me a grumpy face.  To make the ladybugs, I cut the ladybug bodies, the kids cut the legs and antennas, and they finger painted the black spots.

Then they wrote what makes them grumpy.
 
The one above says "When my mommy yells at me."


This one says "When my sister doesn't let me go to sleep."


This last one cracks me up! 
 
It says "Getting whooped with a belt."  I love the way she wrote whooped - "wopt."

 
The bulletin board turned out way cute!!